Embeddable AI Widget
How to Add an AI Chat Assistant to WordPress in Under 10 Minutes
Adding a live, AI-powered chat assistant to your WordPress site does not require writing a single line of code. This guide walks through installing the free Ethora Chat Assistant plugin, connecting it to your Ethora agent, and confirming it works live on your site, screenshot by screenshot.
What you need before you start
- A WordPress site (self-hosted or WordPress.org)
- A free Ethora account at app.chat.ethora.com
- An AI agent already configured in your Ethora account, with the AI Widget enabled on the app you want to use
Step 1: Install the plugin
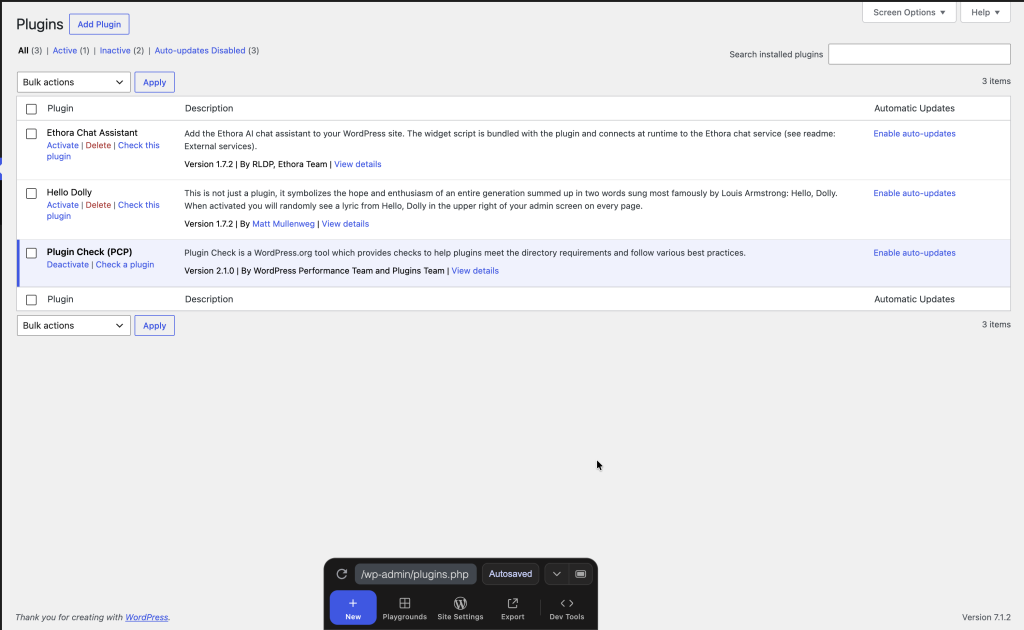
In your WordPress admin, go to Plugins > Add Plugin, search for “Ethora Chat Assistant”, and install and activate it. You can also see it listed alongside your other active plugins once installed:
Step 2: Get your Bot ID from Ethora
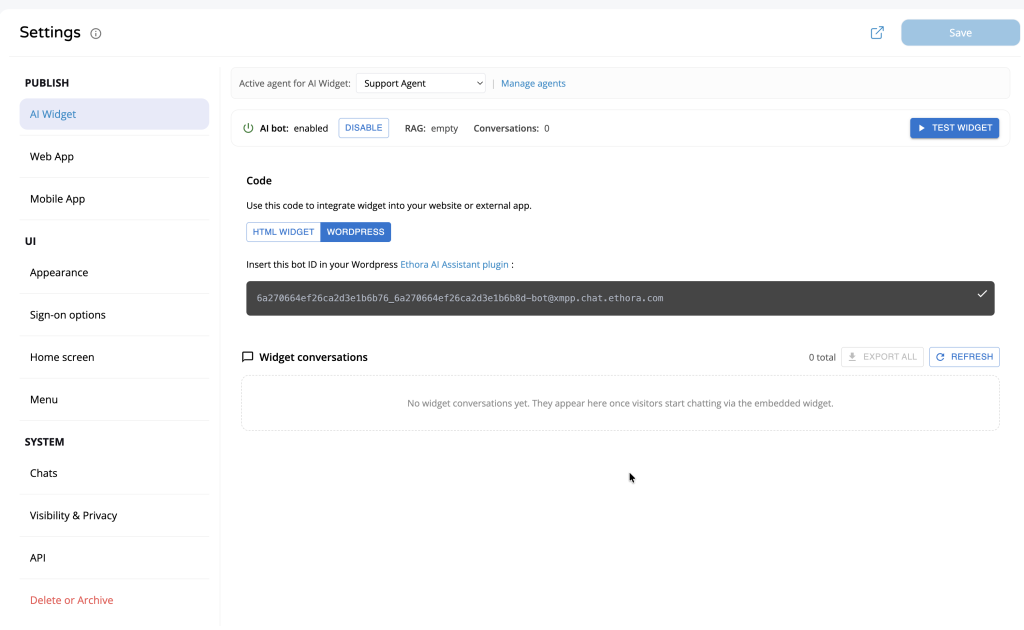
Log into your Ethora account and open Settings > AI Widget. Pick the active agent for the widget, then switch the code tab to WORDPRESS. Copy the Bot ID shown there, it is what links your WordPress site to your Ethora agent:
Step 3: Paste the Bot ID into the plugin settings
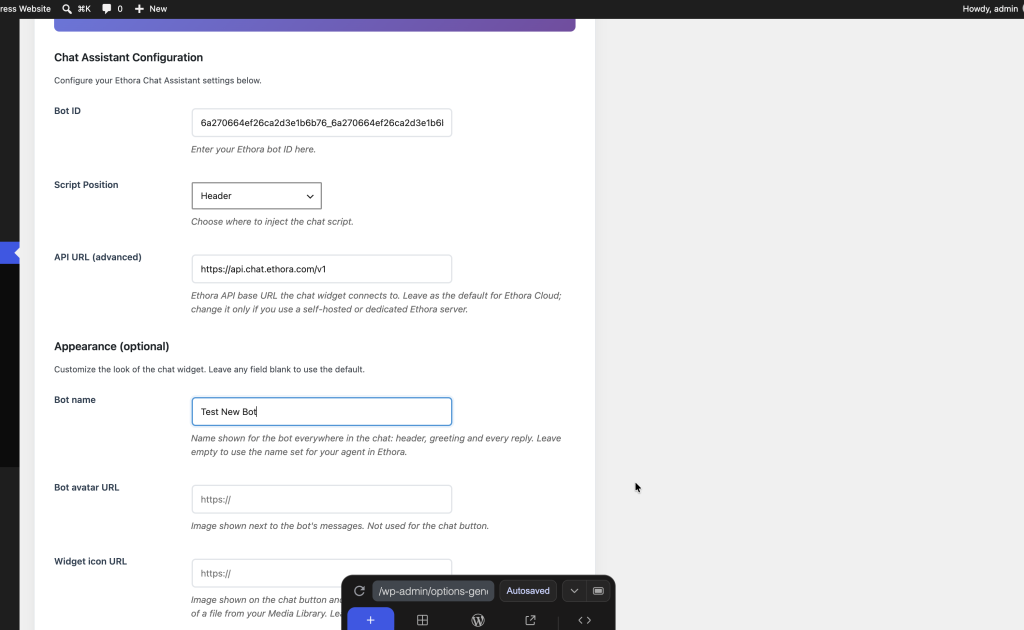
Back in WordPress, go to Settings > Ethora Chat Assistant. Paste the Bot ID you just copied, choose whether the widget script loads in the page header or footer, and leave the API URL on its default unless you run a self-hosted Ethora server. You can also customize the bot’s name and appearance here if you want it to match your site’s branding:
Click Save Settings.
Step 4: Check your site
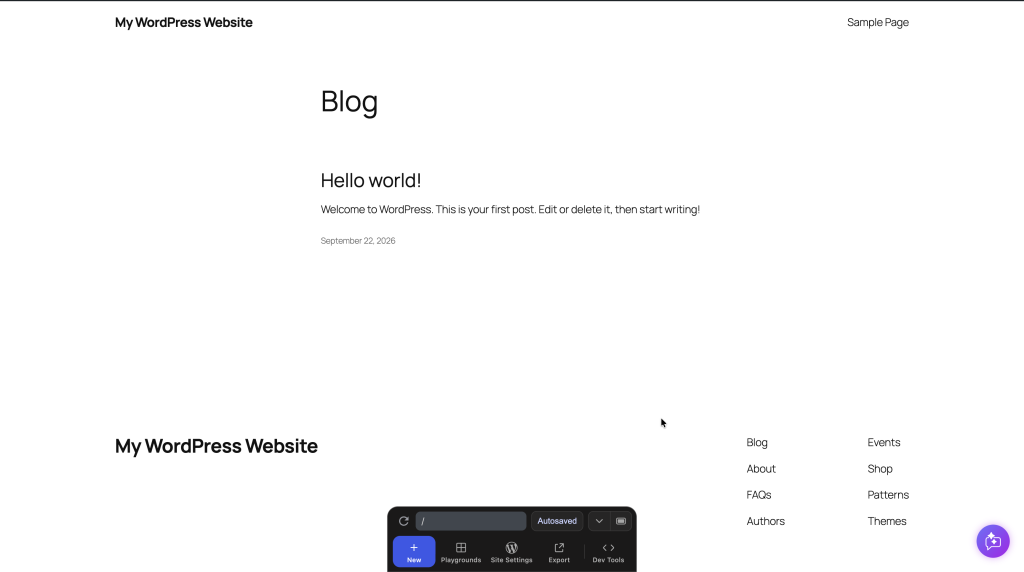
Visit any page on your site. At this point the widget button appears in the corner, ready for visitors to open:
Step 5: Say hello
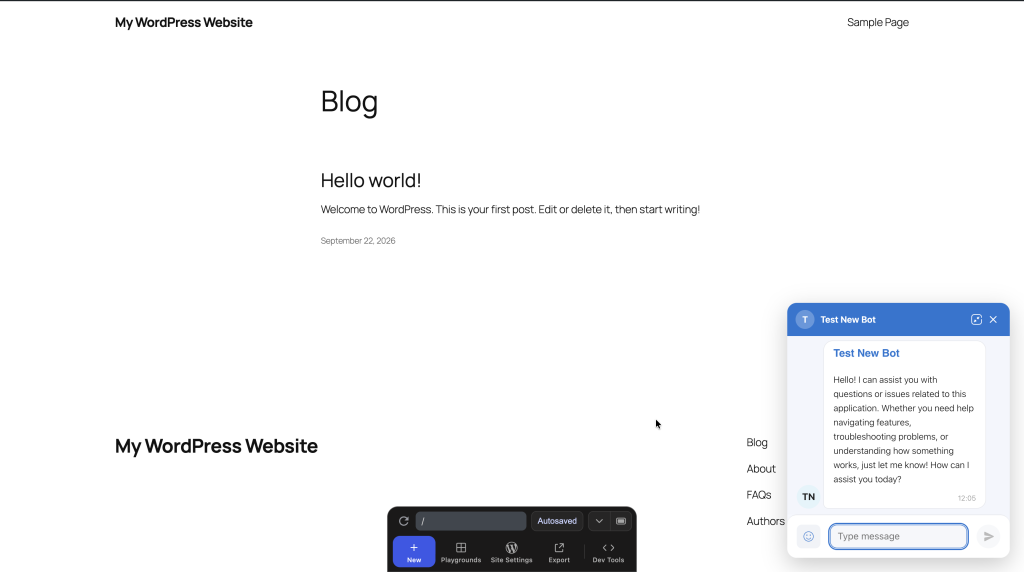
Click the chat button. Your AI assistant greets the visitor immediately and is ready to answer questions about your site, products, or content, using whatever context you gave it in your Ethora agent’s settings:
That’s it. No code, no theme edits, five minutes of clicking. If you want the assistant to actually know about your business instead of just chatting generically, index your website or upload documents to it from the Ethora admin panel, it will use that content to answer visitor questions accurately.

Share with your community


More Articles
Development
Sep 21, 2026
WebRTC vs WebSockets: Real Differences, Real Benchmarks, and When to Use Both
WebRTC vs WebSockets in 2026: real latency + cost benchmarks, when to use each, and how to combine them for chat + voice apps.

Development
Sep 17, 2026
Chat and Messaging Protocols in 2026: What Each One Is, When to Pick, and How to Skip the Choice
In this article, we’ll cover the ten core protocols, 5 protocols that are often missed, real benchmark numbers, and a decision framework.

Try Out Ethora in Action
Experience Ethora's messaging with a dedicated demo from our CEO or start building your App right now!