Difference between revisions of "NFT mint and trasfer"
| Line 21: | Line 21: | ||
This screen can be accessed via Menu -> Mint | This screen can be accessed via Menu -> Mint | ||
[[File:Ethora NFT minting.jpg|alt=Screen showing UI allowing to set name, upload image file, and set rarity number|thumb|Step 1 - NFT minting screen|left]] | [[File:Ethora NFT minting.jpg|alt=Screen showing UI allowing to set name, upload image file, and set rarity number|thumb|Step 1 - NFT minting screen|left]] | ||
<br /> | |||
=== Step 2: Upload media === | === Step 2: Upload media === | ||
| Line 26: | Line 28: | ||
[[File:RN app NFT mint 02.jpg|alt=Screen showing "Choose a file" dialog|thumb|Step 2 - Media upload|left]] | [[File:RN app NFT mint 02.jpg|alt=Screen showing "Choose a file" dialog|thumb|Step 2 - Media upload|left]] | ||
<br /> | |||
=== Step 3: Minting parameters (Title, Rarity, Media) === | === Step 3: Minting parameters (Title, Rarity, Media) === | ||
Confirm the minting parameters to ensure everything is entered correctly. | Confirm the minting parameters to ensure everything is entered correctly. | ||
| Line 32: | Line 35: | ||
[[File:RN app NFT mint 03.jpg|alt=Screen showing uploaded title, media image, rarity and "Mint item" button|thumb|Step 3 - Confirm parameters and media|left]] | [[File:RN app NFT mint 03.jpg|alt=Screen showing uploaded title, media image, rarity and "Mint item" button|thumb|Step 3 - Confirm parameters and media|left]] | ||
<br /> | |||
=== Step 4: Mint === | === Step 4: Mint === | ||
After you tap "Mint", the smart contract will be engaged and create unique blockchain token(s) which represent your Item. It might take some time for this transaction to be propagated through the network. | After you tap "Mint", the smart contract will be engaged and create unique blockchain token(s) which represent your Item. It might take some time for this transaction to be propagated through the network. | ||
[[File:RN app NFT mint 04.jpg|alt=UI showing "awesome!.." confirmation from the App|thumb|Step 4 - Minting|left]] | [[File:RN app NFT mint 04.jpg|alt=UI showing "awesome!.." confirmation from the App|thumb|Step 4 - Minting|left]] | ||
<br /> | |||
=== Step 5: Check your wallet === | === Step 5: Check your wallet === | ||
In your Profile screen you should see the minted Item. In case it doesn't appear simply wait a bit longer as the transaction may have not propagated yet. | In your Profile screen you should see the minted Item. In case it doesn't appear simply wait a bit longer as the transaction may have not propagated yet. | ||
[[File:RN app NFT mint 05.jpg|alt=Profile screen showing Items in User's wallet including our freshly minted NFT|thumb|Step 5 - NFT visible in the profile of the User who has minted it|left]] | [[File:RN app NFT mint 05.jpg|alt=Profile screen showing Items in User's wallet including our freshly minted NFT|thumb|Step 5 - NFT visible in the profile of the User who has minted it|left]] | ||
<br /> | |||
=== Step 6: Check your wallet === | === Step 6: Check your wallet === | ||
You may tap on the Item which will open the screen with Item details. Provenance is an important feature here as it shows the full history of the Item, right from it being minted to the full history of transfers between the Users. This allows to verify the origins and history o items that change hands. This history is taken from blockchain which means it's decentralized and immutable. | You may tap on the Item which will open the screen with Item details. Provenance is an important feature here as it shows the full history of the Item, right from it being minted to the full history of transfers between the Users. This allows to verify the origins and history o items that change hands. This history is taken from blockchain which means it's decentralized and immutable. | ||
| Line 45: | Line 52: | ||
[[File:RN app NFT mint 06.jpg|alt=Screen showing Item image and provenance (when minted, by whom)|thumb|Step 6 - Viewing Item details|left]] | [[File:RN app NFT mint 06.jpg|alt=Screen showing Item image and provenance (when minted, by whom)|thumb|Step 6 - Viewing Item details|left]] | ||
<br /> | |||
=== Step 7: View / play maximized media content === | === Step 7: View / play maximized media content === | ||
Tap on the media preview image to open the maximized view and/or play it if it's in a supported format such as audio or video. | Tap on the media preview image to open the maximized view and/or play it if it's in a supported format such as audio or video. | ||
| Line 50: | Line 58: | ||
[[File:RN app NFT mint 07.jpg|alt=Screen showing modal window with maximized media (image) view|thumb|Step 7 - viewing image maximized|left]] | [[File:RN app NFT mint 07.jpg|alt=Screen showing modal window with maximized media (image) view|thumb|Step 7 - viewing image maximized|left]] | ||
<br /> | |||
== Sending an Item == | == Sending an Item == | ||
Revision as of 00:28, 5 October 2021
Creating an Item (a.k.a minting an NFT)
Unless this feature is disabled in your configuration, Users can mint (create) Items (also known as NFT tokens).
There may be multiple cases where Owners may want to disable or restrict the Items minting functionality:
- No application for Items / NFTs in your Ecosystem
- Minting is restricted to specific User categories (for example, Application devoted to a celebrity or certain sports team, where the value of the digital collectibles derives from them being minted, signed or pre-owned by a certain celebrity / sports star etc).
- Items/NFTs can be circulated in the App, but they are either pre-minted by Owners or imported from external ecosystems / Metaverse.
On the other hand, there might be cases where you might want minting in your Ecosystem but you don't know it's applicable to your use case, for example:
- Educational certificates - Users may upload their educational certificates, diplomas etc to their profile OR authorised body issues an NFT-based tokenized certificate and transfers it to a User to be displayed in User's profile.
- Health certificates, tokenized business documents etc
Aside from these, the usual use cases for Items would be digital collectibles, badges, gamification items, memorabilia etc relevant to your Ecosystem.
Let's describe the steps it takes for a User to mint their own NFT:
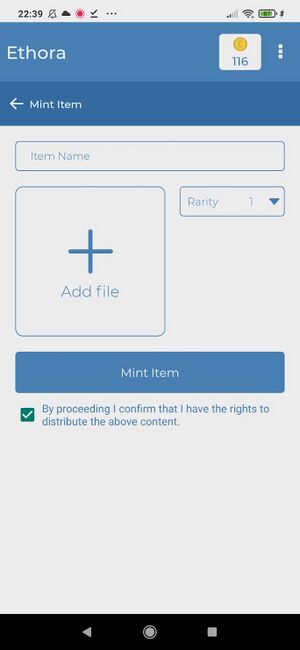
Step 1: NFT minting screen
This screen can be accessed via Menu -> Mint
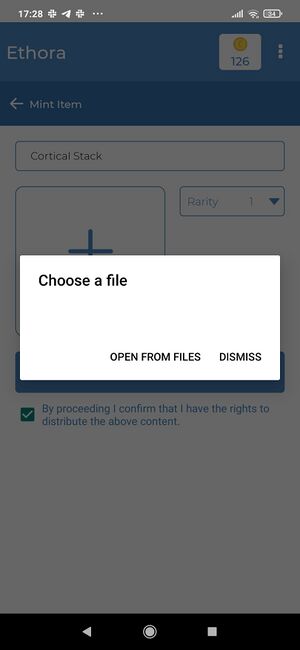
Step 2: Upload media
Upload media file(s) such as image(s), video / GIF animation and/or other binary data.
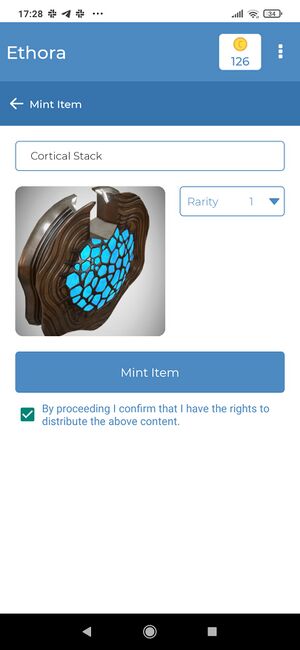
Step 3: Minting parameters (Title, Rarity, Media)
Confirm the minting parameters to ensure everything is entered correctly. Make sure you have specified the Title (name for your Item) and Rarity (how many copies are going to be created).
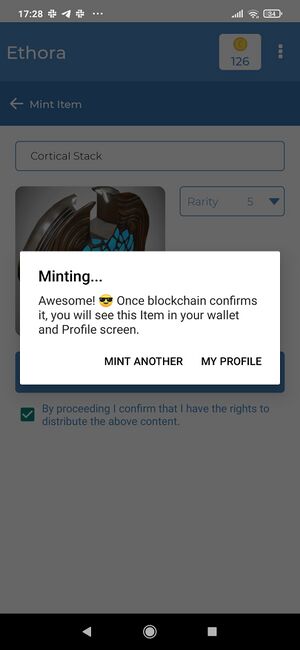
Step 4: Mint
After you tap "Mint", the smart contract will be engaged and create unique blockchain token(s) which represent your Item. It might take some time for this transaction to be propagated through the network.
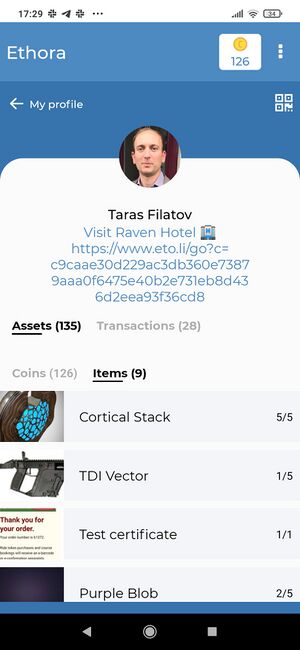
Step 5: Check your wallet
In your Profile screen you should see the minted Item. In case it doesn't appear simply wait a bit longer as the transaction may have not propagated yet.
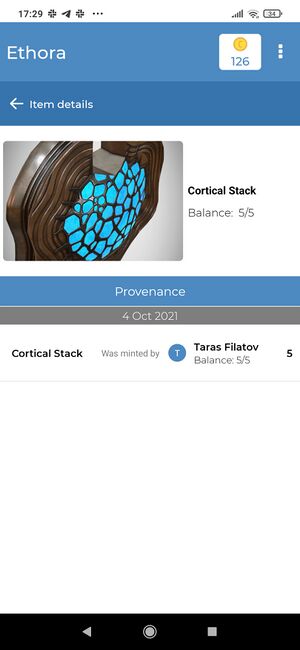
Step 6: Check your wallet
You may tap on the Item which will open the screen with Item details. Provenance is an important feature here as it shows the full history of the Item, right from it being minted to the full history of transfers between the Users. This allows to verify the origins and history o items that change hands. This history is taken from blockchain which means it's decentralized and immutable.
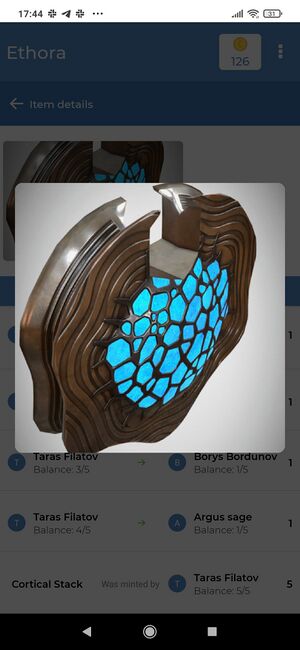
Step 7: View / play maximized media content
Tap on the media preview image to open the maximized view and/or play it if it's in a supported format such as audio or video.
Sending an Item
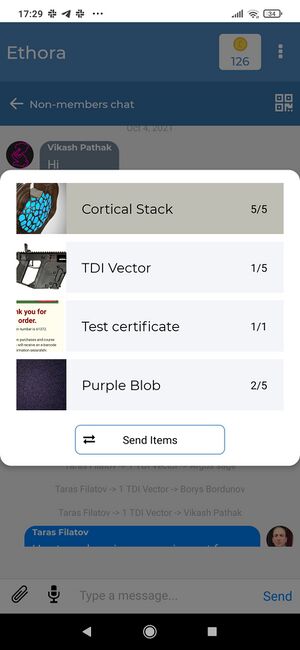
In Ethora platform, the easiest way to send an Item to another user is via a Room (Space) which may be public/group or 1:1.
To do so, long tap on a profile of another user or on their message. The dialog will appear.
